

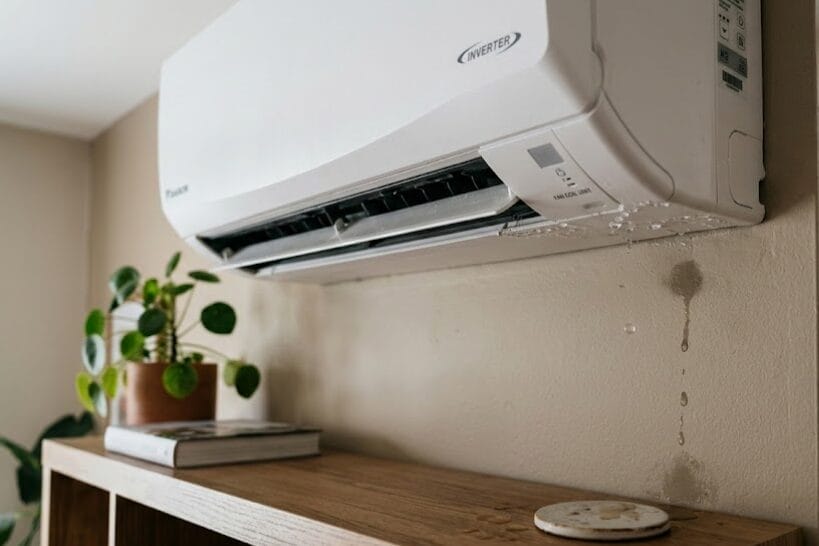
When your AC is leaking water, act fast. Left alone, a dripping air handler can warp flooring, soak insulation, and trigger hidden mold growth.
This guide shows you how to shut the system down safely, identify the source, and fix the most common causes before calling a professional.
Grab towels, a bucket, a flashlight, a wet/dry vacuum, and a fresh air filter before you begin. If water is near electrical outlets or your breaker panel, skip ahead and call a licensed technician immediately for an AC Repair.
Non-Stop Air Conditioning & Heating has served Southwest Florida homeowners for more than two decades — start with Step 1.
Call (239) 990-5399 for Same-Day Service
Step 1: Shut Down the System and Secure the Area
Running an AC that’s leaking water increases the risk of electrical damage and structural issues. Stop the system first before troubleshooting anything else.
Turn off the thermostat
Set the system to OFF to stop the cooling cycle and condensate production.
Cut power at the breaker
If water is pooling near the indoor unit, switch the HVAC breaker OFF to avoid shock risk.
Contain the leak
Place a bucket under the drip point and lay down towels. Move furniture and electronics away from moisture.
Check ceiling fixtures
If water is dripping from a light fixture, shut off that room’s circuit and do not run the AC.
Remove standing water
Use a wet/dry vacuum and dry surfaces with fans to reduce mold risk.
Document the damage
Take photos of the leak, the unit label, and any visible ice to help with diagnosis.
Success check: Water is contained and the system is no longer producing condensate.
Related Article: Why Is My Air Conditioner Blowing Warm Air?
Step 2: Identify Your System Type and Leak Location
In Southwest Florida, where the leak appears is the most reliable clue to why your AC is leaking water. Start by identifying your system type:
- Central split system: Air handler located in a closet, garage, or attic.
- Ductless mini-split: Unit mounted on an interior wall.
- Window or portable AC: Units plugged into standard wall outlets.
Match your leak location to one of these likely causes:
1. Floor near the air handler
Clogged drain line, pan overflow, or a failed condensate pump.
2. Dripping from the ceiling
Blocked attic unit drain. Treat this as urgent — ceiling drywall damage happens fast.
3. Mini-split head dripping
Blocked drain or dirty coil causing water to track down the wall.
4. Window or portable unit leaking inside
The unit isn’t tilted outward, or the internal reservoir is full.
Verification: You’ve identified a likely cause. Continue to Step 3 (airflow issues) or Step 4 (drain line).
Step 3: Restore Airflow and Thaw the Evaporator Coil
Restricted airflow is one of the most common causes of ice buildup and AC water leaks. When the evaporator coil freezes, it releases excess water as it thaws.
1. Check the air filter
Pull your return filter. If it’s visibly dirty or you can’t see light through it, replace it. In Cape Coral and Fort Myers, filters often clog every 30 days.
2. Look for ice buildup
Inspect the copper refrigerant lines and the evaporator coil for frost. Weak airflow at the vents is another indicator.
3. Thaw the system
If you see ice, turn cooling OFF and set the fan to ON. Room-temperature air will melt the ice safely. Put towels down to catch the meltwater. Never chip at the ice or apply heat — that damages the aluminum fins.
4. Verify success
All ice must be gone and airflow restored before you restart cooling. If the unit refreezes again, stop — that usually signals a refrigerant leak or mechanical failure.

Step 4: Clear the Condensate Drain Line
A wet/dry vacuum can clear an AC drain line in under 10 minutes. Most clogs in Southwest Florida stem from algae or ‘white slime’ buildup inside the PVC line. Locate the white PVC pipe near your indoor air handler and trace it to the outdoor exit. A clog is likely if water is standing in the indoor tee or the outdoor pipe stays dry during humid operation.
- Turn the AC system OFF at the thermostat.
- Attach a wet/dry vacuum to the exterior pipe termination.
- Seal the connection with a rag.
- Run the vacuum for 2 minutes.
- While the vacuum runs, slowly pour 2 cups of water into the indoor access tee using a funnel.
- Confirm a steady flow of water at the outdoor exit.
For window units, check for a slight outward tilt and clear debris from the exterior drain holes. For portable ACs, empty the internal tank and confirm the drain hose is level and unkinked.
Call Non-Stop Air if:
- The drain line routes through a finished ceiling.
- You can’t find the outdoor drain exit.
- Water appears near electrical connections or wiring.
Step 5: Inspect the Drain Pan, Pump, and Safety Switches
Locate the emergency drain pan beneath your air handler. Use a flashlight to check for hairline cracks, rust spots, or overflow marks. Standing water in this pan means the primary drain isn’t evacuating fast enough.
If your system uses a condensate pump, check that it has power and the reservoir isn’t overflowing. Test it by manually lifting the internal float — the motor should kick on immediately. A humming sound with no water movement usually means a broken or blocked impeller.
Check the safety float switch on your PVC drain line. This switch shuts the system down when water backs up, protecting your ceiling. If it trips repeatedly, treat that as a symptom of a larger drainage failure. Never bypass this switch.
Success check: The secondary pan stays dry and the condensate pump clears the reservoir when triggered.
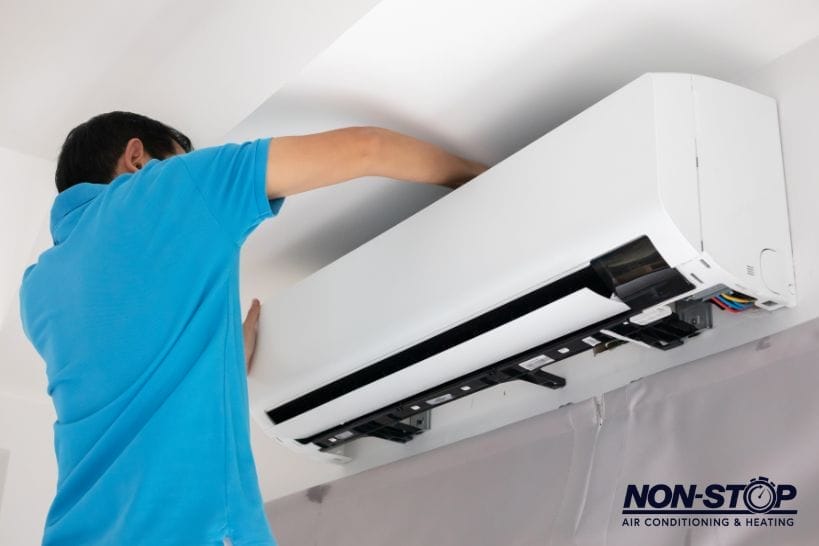
Step 6: Recognize When to Call a Licensed Technician
Check your unit’s physical alignment first. If an indoor air handler or pan looks tilted after recent service, or a window unit has no outward slope, gravity may be the culprit.
Look for these indicators of a deeper mechanical problem:
- Dirty coils: Musty odors or visible buildup on the fins require a professional chemical cleaning.
- Low refrigerant: Hissing, gurgling, or persistent ice on the lines — even with a clean filter — points to a refrigerant leak.
Both issues involve pressurized systems that only a licensed technician should handle. If you hear hissing or see ice, shut the power off immediately to protect the compressor.
Success check: You have a specific symptom list ready to give your technician for a faster, more accurate diagnosis.

Step 7: Monitor Your Results or Escalate for Professional Repair
If you cleared a clog or corrected a tilted pan, restore power and monitor the unit for 30–60 minutes. Confirm water is draining steadily at the exterior termination and no new pooling appears indoors.
Call for service immediately if any of these happen:
- Water leaks through a ceiling or light fixture.
- The condensate pump fails or ice returns.
- The drain line stays blocked after vacuuming.
Before you call, note these details to speed up your diagnostic:
- Exact leak location and any unusual sounds.
- Whether you saw ice on the coils or refrigerant lines.
- Air filter condition and whether the drain line had flow.
Southwest Florida contractors like Non-Stop Air give you a clear diagnosis and written repair options before any work starts.
Call (239) 990-5399 — We Answer 24/7
Pro Tips for Preventing AC Water Damage
Flush Your Drain Line Monthly
Pour one cup of distilled white vinegar into the drain line access port every 30 days to kill algae and ‘white slime.’ Skipping this allows biofilm to clog the pipe and trigger an emergency system shutdown.
Shorten Your Filter Schedule
Ignore the ’90-day’ label on the packaging. In humid Cape Coral, check filters monthly. Restricted airflow causes the evaporator coil to freeze — and when that ice melts, it sends a surge of water that easily overwhelms the drain pan.
Test the Safety Float Switch
Manually lift the switch float to confirm the system cuts power immediately. This is your first line of defense against indoor flooding. If it doesn’t trip, a routine clog can escalate into a collapsed ceiling.
Verify the Condensate Pump
Pour water into the reservoir to confirm the pump triggers and evacuates correctly. A healthy system holds a bone-dry emergency pan, produces a steady outdoor drip, and doesn’t smell musty near the air handler.
Frequently Asked Questions About AC Water Leaks
Can I keep running my AC if it’s leaking water?
No. Even if your home still feels cool, running a leaking unit risks structural damage and electrical shorts. A persistent leak also encourages hidden mold growth. Run a brief, monitored test only after a DIY fix. Otherwise, keep the power off until the source is resolved.
Why is water dripping from my ceiling when the AC is in the attic?
That usually means the primary drain is blocked and the emergency attic pan is overflowing. This is critical — heavy water can cause your ceiling to collapse. Shut the system off at the breaker, contain the water, and call for service.
Is it water or refrigerant leaking — how can I tell?
Clear puddles are water. Refrigerant leaks show up as hissing sounds, repeated icing on lines, and a sudden drop in cooling output. Refrigerants require a certified technician. If you suspect a refrigerant issue, shut the system off to protect the compressor.
What does it typically cost to fix an AC water leak?
Drain line clearing typically runs $100 to $250. Replacing a condensate pump or drain pan usually falls in the $300 to $600 range. Costs vary based on equipment access and damage severity. Always ask for a written estimate with itemized options before any work begins.
Does homeowners insurance cover AC leak water damage?
Most policies cover sudden, accidental water damage. They frequently deny claims tied to long-term neglect or deferred maintenance. Document the leak with photos and contact your insurance provider to find out if your situation qualifies.
Can I DIY this, or should I hire a professional?
Homeowners can safely handle filter swaps and basic drain clearing with a vacuum. Hire a professional for ceiling leaks, recurring ice, pump failures, or anything involving electrical components. Non-Stop Air Conditioning & Heating offers 24/7 emergency service when you’d rather have an expert handle the repair.